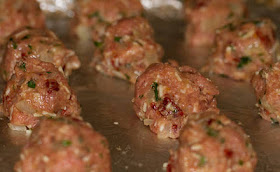
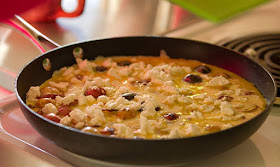
Monday, December 19, 2011

S'mores Bars In A Jar and Candy Cane Cookies


Photos Courtesy of Dave McCoy

We all know one annoying person that already has all of his or her Christmas shopping completed, packages wrapped and shipped, and Christmas cards mailed out. I am usually envious of that person but this year (don't hate me when I say this), that person is me. Yep, I am done with everything. When I say everything, I really mean it. I even have stocking stuffers wrapped and organized. Now, I know this is a good thing but it also comes with drawbacks. I am usually right in the thick of preparation during the week before Christmas and I am finding that I feel a bit less festive with everything completed. When Natalie called on Friday to ask if Olivia and I would like to come over to make holiday cookies with her and Nessa, we jumped on it. This was just what we needed to keep us in the pre-Christmas mood.

Natalie had two types of cookies planned for the day. The first was a recipe for S'mores Bars In A Jar that came from Nessa's school with most of the ingredients already assembled. The second recipe was for Candy Cane Cookies. Our main goal was for the girls, who are three and six, to have a fabulous time making the cookies. This goal was absolutely accomplished. Both recipes follow:

S'mores Bars In A Jar-
Ingredients:
1 1/2 cups crushed graham crackers
1 1/2 cups miniature marshmallows
1 1/2 cups chocolate chips
1/3 cup brown sugar
1/2 cup melted butter
1 tsp vanilla

Place graham crackers, marshmallows, chocolate chips and brown sugar in a jar or plastic bag. Teddy grahams or a mixture of teddy grahams and graham crackers can be used if preferred. Combine jar contents with 1/2 cup melted butter and 1 teaspoon vanilla.

Photo Courtesy of Natalie McCoy

Press mixture into 9 inch square baking pan. Place marshmallows on top. Bake at 350 degrees for 15 minutes. Let cool completely. Cut into bars. Makes 12 bars.

Candy Cane Cookies-
Ingredients:
1 cup butter, at room temperature
1 cup sugar
2 large egg yolks
3 cups all-purpose flour
1 Tbsp baking powder
1/4 tsp salt
5 Tbsp milk
1 tsp vanilla
1/4 tsp peppermint or almond extract
red food coloring

Photo Courtesy of Natalie McCoy

In a large bowl, beat butter and sugar until smooth with an electric mixer on high speed. Beat in egg yolks. In another bowl, mix flour, baking powder and salt. In small bowl, combine milk, vanilla and peppermint or almond extract (Natalie prefers almond). Stir flour mixture into butter mixture alternately with milk mixture, blending thoroughly after each addition.

Divide dough in half. Leave one half in mixing bowl and stir in a few drops of red food coloring. Divide each half of dough in half again (four portions total); wrap dough portions in waxed paper or cooking parchment and chill until firm but still pliable, about one hour. (Natalie completed all of the preparation up to this point).

Unwrap dough and roll each of the four pieces into smooth ropes, about 15 inches long. Twist each white rope with a red rope into a 13-inch-long combined rope, for a total of two ropes. Wrap twisted rolls in waxed paper, chill until firm, at least 4 hours or up to one week.

Unwrap dough. Using sharp knife, cut rolls into 1/8-inch-thick slices; place slices about 1 inch apart on buttered 12" by 15" baking sheets and bend into candy cane shape. Bake cookies in oven at 350 degrees about 10 minutes, or until light golden. (Natalie crushes peppermint candy and lightly presses the crushed pieces into the top of the cookies right as they come out of oven. This makes the cookies even prettier). Transfer to racks to cool.

Photo Courtesy of Dave McCoy

The Smore's In A Jar recipe was tasty but it was so chocolaty that we had to eat it directly out of the pan with a spoon. This was hardly torturous but Natalie and I came to the conclusion that there may have been more than 1 1/2 cups of chocolate chips in the jar. Either way, this was the perfect cookie bar for the girls to make because it only required combining and stirring; two of their favorite things about baking. The Candy Cane Cookies were more for fun than flavor. Although the cookies tasted good enough to eat, they were quite mild and in my opinion, slightly inconsequential. They would be a nice addition to a cookie platter but I like my cookies to have a stronger flavor. I did however, appreciate Natalie's addition of crushed peppermint candy. This was the most flavorful part of the cookie.

All in all, we had a wonderful time making cookies. The girls also decorated a gingerbread house, created artwork with crayons and stickers, and dressed up in princess costumes. We couldn't have asked for a more festive day.

Recipe Sources:

S'mores Bars In A Jar
squawkfox.com

Candy Cane Cookies
Sunset Magazine, November 2003 via myrecipes.com

Wednesday, December 14, 2011

Shrimp and White Bean Salad with Harissa Dressing


Photo Courtesy of Dave McCoy

I am going to keep this short and sweet tonight. I was on the search for a light meal that required little preparation time when I came across this recipe for Shrimp and White Bean Salad with Harissa Dressing. At first glance, the recipe appears to be best suited for a summer meal but upon further thought, I realized that it is perfect for winter. The beans provide bulk to help the salad stick to your ribs and the Harissa provides heat. These are both elements that I look for in a winter meal. For those of you that are not familiar with Harissa, it is a North African chile and spice paste. I frequently witness the use of Harissa on cooking shows and I have always wanted to try it. This made my decision to move forward with the following recipe quite easy.

Ingredients:
3 cups arugula
2 cans (15 oz each) cannellini beans, rinsed and drained
1 celery stalk, sliced thinly diagonally
1/3 cup flat-leaf parsley leaves
1 lb large peeled cooked shrimp (26 to 30 per lb)
3 to 4 Tbsp Harissa
1/4 cup lemon juice
1/3 cup extra-virgin olive oil
1 large garlic clove, minced
1/2 tsp kosher salt

Place arugula, beans, celery, parsley and shrimp in large bowl. Mix remaining ingredients in small bowl and serve on side to add to salad. Serves 4 to 6.

As you can see, my goal to find a recipe with little prep time was achieved. The salad took about 15 minutes to prepare and every step was enjoyable. I loved the flavor of Harissa and the heat it brought to the salad. The McCoys were over for dinner tonight and they both really liked it as well. We all used the Harissa mixture not only as a dressing for the salad, but as a dip for our Ciabatta bread. I have never tasted a similar chile paste but I can give you an idea of the flavor by providing the ingredients. The Harissa that I purchased is handmade in Tunisia by a company called Les Moulins Mahjoub and is made of sundried piments, extra-virgin olive oil, garlic, sundried tomatoes, salt, coriander and caraway seeds. It is organic and a bit pricey but worth every penny. I highly recommend running out to buy a jar for your pantry because I can envision using the paste for pastas, sandwiches and rice dishes.

As a side note, parsley and arugula go beautifully together. It is a combination that I never would have dreamed up but I will definitely use these two ingredient together in the future.

Recipe Source:
Sunset Magazine, December 2011
Page 104

Tuesday, December 13, 2011

German-Style Plum Kuchen and Apple Kuchen


Photo Courtesy of Brad Lovejoy

Brad, Olivia and I just arrived home from an early Christmas celebration in Eugene. We were able to spend four days with my family, including a lovely evening at my Grammie's house. I have mentioned my grandmother's cooking aptitude several times in past entries and let me just say that this dinner was no exception. She started with a spread of appetizers including an array of gourmet olives, Spanish chorizo and pork skewers. We then moved on to Belgian pork meatballs with cherry sauce, smashed lemon and green onion potatoes, and asparagus. My Grammie was born in Belgium and the meatball recipe is a family recipe that has been passed down for generations. Both the meatballs and potatoes went over like gangbusters with everyone in attendance. Brad and I liked the potatoes so much that I may even prepare the recipe to include on my blog in the near future.

The piece de resistance however, was a wonderful German desert called Kuchen. Basically, Kuchen is a thin, buttery cake that is decorated by baked fruit topping. The cake base is very much like tender pound cake that supports the fruit high on its surface. There are many variations of this desert based on the type of fruit being used. Grammie chose to prepare one plum and one apple for our meal but you can also prepare the dish with nectarines, pears and peaches. I believe other fruits would work as well but I know that apples and stone fruits work for sure. Although I did not prepare the following recipe myself, it was so delicious that I chose to share it anyway.

Ingredients:
1/2 cup soft butter
1/2 cup sugar
3 eggs
1/2 tsp vanilla
1 cup unsifted all-purpose flour
14 to 16 Italian plums or 2 large apples, peeled and sliced

In electric mixer bowl, cream butter with sugar until smoothly blended. Beat in eggs, one at a time, beating thoroughly after each addition. Stir in vanilla and flour until batter is well mixed. Butter and flour an 11-inch round shallow pan (a tart pan with removable bottom is the most desirable although you can use a fixed-bottom pan). Spread batter evenly in pan and arrange fruit over the surface according to specific directions.

Bake cake in moderately hot oven (375 degrees) for 40 minutes or until cake feels firm when touched in center. Let cake cool at least 30 minutes on wire rack. Remove pan rim, if possible, and serve cake warm, or cool completely and serve cold. Makes 10 to 12 servings.

For Plum Kuchen, cut 14 to 16 Italian plums (fresh prunes or purple plums) in halves and remove pits. Arrange halves, cut side up over surface of unbaked Butter Kuchen, placing them close together. Sprinkle fruit evenly with 2 to 3 tablespoons sugar, then bake and cool as directed for Butter Kuchen. About 30 minutes before serving the cake, dust surface liberally with powdered sugar. This allows time for sugar to dissolve on the fruit, making a distinct pattern on the cake.

For Apple Kuchen, peel and slice two large apples and arrange slices on surface of unbaked Butter Kuchen, placing them close together. Follow same directions as Plum Kuchen to finish.

Photo Courtesy of Brad Lovejoy

What is so great about Kuchen, you may ask? Where do I start? First of all, the description of this desert being similar to tender pound cake is completely accurate. I happen to love pound cake so the similarity is welcome. I really appreciate that the end result was rich, light, and flavorful. As a matter of fact, I would choose to eat Kuchen over pie any day of the week because I am not a big fan of pie crust. I do however, enjoy pie filling and this desert provides the feeling of pie but in cake form. Finally, Kuchen is aesthetically beautiful. I would be proud to serve it to dinner guests or to take it to an event when I am in charge of providing desert.

Recipe Source:
Mary Moore from her recipe archives

Tuesday, December 6, 2011

Pasta alle Zucchine con Salsa di Peperoni


Photo Courtesy of Brad Lovejoy

Have you ever taken a bite that was pure perfection? Tonight's recipe afforded me this exact luxury. I once again, turned to my favorite pasta cookbook by Marlena Spieler for inspiration and came across this beautiful recipe for Pasta alle Zucchine con Salsa di Peperoni (Pasta with Courgettes and Red-pepper Sauce). I am always wowed by the brilliant simplicity of Marlena's recipes. She has an ability to turn the most basic ingredients into a meal that I am proud to serve. The best part is that preparing her dishes makes me feel like a culinary virtuoso instead of a novice. The following recipe was no exception.

Ingredients:
large jar of roasted red peppers (9 ounces)
1 ounce chives
2-3 cloves garlic, finely chopped
5-8 leaves basil, thinly sliced
2-3 Tbsp extra virgin olive oil
dash of balsamic vinegar or white wine vinegar
salt and freshly ground black pepper
1 pound spaghetti
4 courgettes (small zucchini), cut into bite-sized pieces

Finely chop peppers and place in bowl with chives, garlic, basil and half of olive oil. Season to taste with vinegar, salt and pepper and set aside.

Photo Courtesy of Brad Lovejoy

Bring large pan of salted water to boil, add spaghetti and cook for about 4 minutes; add courgettes and continue to cook until spaghetti is just tender or al dente.

Photo Courtesy of Brad Lovejoy

Drain, then toss pasta and courgettes with remaining olive oil and serve immediately, topping each portion with a dollop of red-pepper sauce.

The red-pepper sauce was amazing! The combination of flavors could not have been more balanced. The slight bitterness from the basil and garlic was balanced perfectly by the kosher salt and sweetness of the balsamic vinegar and peppers. The chives added freshness and texture to the sauce that paired perfectly with the spaghetti. I usually saute zucchini prior to adding it to my pasta dishes so I was curious to see how it would turn out when boiled right along with the pasta. This method worked so well that I will save myself a step and prepare it this way moving forward.

Brad and I liked this recipe so much that we kept making comments like "mmmmm" and "yum" between bites. I personally liked the dish enough to add it to my cooking repertoire. I can envision myself keeping a jar of red peppers on hand so I can prepare it at any time; especially in summer when I can run down to the garden to pick fresh garlic, chives, basil and zucchini. As a side note, I used organic ingredients with the exception of the pasta which was a high quality Italian spaghetti (but not organic). And, one final recommendation...... use more than a dollop of red-pepper sauce. It is so good that a dollop is just not enough.

Recipe Source:
"Pasta" by Marlena Spieler
Page 138

Friday, December 2, 2011

Best Ever Black Bean and Rice Soup


Photo Courtesy of Brad Lovejoy

Well, it is official. As promised, I am on a major soup kick. Every year by late November, I seem to fall into a pattern of preparing soup from scratch two or three times per week. Soup is a crowd pleaser at our house so this works well for everyone. I often choose the type of soup to prepare by looking in the refrigerator and cupboards to see what I have on hand. I then throw it all in a pot with broth and simmer until ready to serve. Tonight's recipe however, was inspired by one of Brad's favorite foods; black beans with rice. He mentioned that I hadn't made any variation of black beans with rice in quite a while so I decided to see if I could find a soup that combines the two ingredients. Voila! The following recipe for Best Ever Black Bean and Rice Soup appeared before my eyes.

Ingredients:
2 cans seasoned black beans (drained, not rinsed)
1 can chicken broth
1 1/2 cups water
2 Tbsp olive oil
1 cup chopped onion
2 cloves garlic minced
2 tsp chili powder
1/4 tsp cumin
white rice (follow box or bag instructions for 4 servings)

In large pot, saute onions and garlic in olive oil until soft. Add chili powder and cumin. Stir. Add remaining ingredients and let simmer for 15 minutes. Put immersion blender directly in pot so that some beans are blended and some remain intact. Place cup of rice in bowl, pour soup over rice and garnish with fresh cilantro.

This soup was tasty. I initially found it to be a bit bland but after I took a few bites with cilantro, I began to enjoy the combined flavors of cilantro, cumin and chili. Brad liked it from the first bite so perhaps my taste buds were a bit off. This was my first time using an immersion blender, which by the way is a fabulous kitchen tool, and I blended the soup for a few seconds too long. My soup was creamier than intended so the only change I would make is to leave more of the beans intact. This would give the soup more contrast in texture. All in all, this was a successful recipe. I would whip it up again for dinner anytime. Preparation was speedy and the end result was both hearty and nutritious.

Recipe Source:
comfyinthekitchen.com

Sunday, November 27, 2011

Vegetarian Split Pea Soup


Photo Courtesy of Brad Lovejoy

After such extravagant holiday eating, we are officially in need of a week that includes healthy vegetarian meals and lots of exercise. To start things off, I looked in my cupboards to see what ingredients I might already have on hand. I ran across a bag of dried organic split peas and decided that a vegetarian split pea soup would get our eating right back on track. I have never prepared vegetarian split pea soup (I usually make it with ham) but about ninety percent of the soups I make from scratch are vegetarian. I found the following recipe and moved ahead with preparation.

Ingredients:
3 cups dried split peas
6 to 7 cups vegetable broth or water
1 bay leaf
1 tsp dried mustard
2 tsp kosher salt
1 carrot, diced
3 celery stalks, diced
2 cups onion, diced
1 potato, diced
4 medium garlic cloves, minced
freshly ground black pepper
1 to 4 tsp balsamic vinegar or red wine vinegar, to taste

Optional Toppings:
sesame oil
fresh ripe tomatoes, diced
fresh parsley, minced

Place first five ingredients in a large pot. Bring to boil, reduce heat and simmer partially covered for about 20 minutes, stirring occasionally to prevent split peas from sticking to bottom of pot. Add onions, garlic, celery, carrot and potato (you can saute these first or add them directly to soup for fat free soup).

Partially cover and allow to simmer for about 40 minutes, stirring occasionally. You may need to add more water. Serve topped with a drizzle of sesame oil, tomatoes and/or parsley if desired. Season to taste with pepper and vinegar. Serves 6 to 8 people.

This soup smelled heavenly while simmering on the stove. The final result was hearty, healthy, tasty and perfect for a stormy day like today. Balsamic vinegar was brilliant in this recipe and even though the addition of sesame oil sounds strange, it really worked. Prep time was about 20 minutes and consisted only of dicing and mincing vegetables along with occasional stirring. I highly recommend this recipe if you are craving healthy soup that requires minimal preparation.

Recipe Source:
food.com

Thursday, November 24, 2011

Cranberry Apple Pie and Thanksgiving Table


Photo Courtesy of Brad Lovejoy

As mentioned in my previous entry, Metropolitan Market provided a pumpkin pie with our meal so I decided against baking pumpkin pie this year. I opted instead to make Cranberry Apple Pie. I hold very special childhood memories of my mom making apple pies from scratch. She had a pie crust recipe that even I loved (that is saying a lot because I am not a traditional pie crust kind of gal). It was rich, buttery and flaky; everything a pie crust should be. I have never tried to recreate her pies because she had such a gift for baking that I don't even want to make an attempt. As my cooking and baking confidence grows, I may change my mind but for now, I will stick with alternate recipes such as the following:

Ingredients:
2 cups sugar
1/4 cup cornstarch
1/4 cup orange juice
1/8 tsp ground nutmeg (I freshly grated mine)
1/2 tsp cinnamon
1/2 tsp apple pie spice
1/4 tsp lemon juice
2 cups fresh cranberries (I purchased gorgeous fresh cranberries from our Farmer's Market)
4 cups peeled and sliced tart apples
pastry for double-crust 9-inch pie (I used a local, all-natural pie pastry from Met Market)
2 Tbsp butter

In large bowl, combine first seven ingredients. Add apples and cranberries; toss gently.

Photo Courtesy of Brad Lovejoy

Line 9-inch pie plate with bottom pastry. Add filling; dot with butter. Roll remaining pastry to fit top of pie. Cut vents in pastry, using small apple cutter if desired. Place over filling; seal and flute edges.

Bake at 425 degrees for 10 minutes. Reduce heat to 350 degrees; bake 50 minutes longer or until crust is golden brown and filling is bubbly. Yield: 6 to 8 servings.

I was unfortunately, a bit disappointed in the end result. The pie was aesthetically pleasing but the inside was watery, which I believe was due to the addition of orange juice. I was a bit skeptical when I saw that the recipe called for orange juice and I should have gone with my gut. The pie flavors were nice; the texture was just off.

Instead of placing a full crust on top of the pie, I opted to use my Williams-Sonoma pie shape-cutters to create a montage of leaves and acorns. The top of the pie turned out very pretty so at least it added to the beauty of my Thanksgiving table.

Photo Courtesy of Brad Lovejoy

As you can see in the photo above, I used cranberries and Satsuma oranges as the central theme for the table. I borrowed the idea from a photo of a centerpiece bowl filled with pears that I saw years ago. The cranberry idea came from a table decorating presentation I attended two weeks ago with my mother-in-law. I tend to prefer simple decorations that allow our guests to see each other across the table and my decorating scheme worked well for this purpose. We invited our friends, the Matzens, for Thanksgiving dinner. After dinner, the kids played while Brad, Tom, Heidi and I played music and talked. Our house was full of activity and love, which is exactly what Thanksgiving is about. What a perfect day.

Recipe Source:
tasteofhome.com

Amuse Bouche Pecan and Bleu Cheese Grapes


Photo Courtesy of Brad Lovejoy

I am going to come clean and admit that for the past two years, I have ordered the bulk of our Thanksgiving dinner from Metropolitan Market. The market prepares a beautiful array of side dishes (you can pick and choose which items you would like) as well as a free-range roasted turkey that is ready for pick up on Thanksgiving morning. I purchase the turkey, a double serving of mashed potatoes, stuffing, cranberry sauce, rolls and then fill in the blanks with my own creations. I usually bake two pumpkin pies but Met Market includes one with the meal so I decided to bake a second type of pie this year, which you will see in my next entry.

The only required preparation for the Met Market meal is a reheating process. Because preparation is so simple, I am able to focus on other aspects of the meal such as setting a pretty table and preparing hors d' oeuvres. This year, I decided to make a one-bite appetizer to serve in amuse bouche spoons that I purchased last month. When I saw the spoons, I knew immediately that I wanted to use them for Thanksgiving. By the way, an amuse bouche is a single bite-sized hors d' oeuvre that cannot be ordered off the menu but is instead designed especially by the chef. It is meant to be a tingler for the taste buds in preparation for the meal to come. Fun, right? I set out to find the perfect amuse bouche for the holiday and ended up finding this recipe for Pecan and Bleu Cheese Grapes. The recipe follows:

Ingredients:
4 ounces cream cheese
6 ounces soft bleu cheese (I used Saint Agur Bleu)
20 seedless red grapes
2/3 cup pecans or walnuts

Toast pecans under broiler for 2 to 3 minutes or until lightly toasted. Transfer to small bowl. In another small bowl, mix cheese together. Put in refrigerator, cover and allow to firm slightly; about 15 minutes.

Place one heaping teaspoon of mixture in palm of hand with grape and roll until grape is completely coated, then roll in toasted pecans. Place on plate in single layer without touching each other and chill for 30 minutes, or until coating is firm. Place each piece in serving spoon (amuse bouche spoon) and serve. Serves 20.

This is literally one of the tastiest bites I have eaten in the past number of months; which is saying a lot considering all of the dishes I have prepared. Grapes and bleu cheese are natural partners but the cream cheese and toasted pecans added important elements to the dish. The cream cheese mellowed the bleu cheese flavor and added a smooth quality to the bite. The toasted pecans were rich and provided the perfect crunch. This dish was so good that I am already planning to prepare it again for our New Year's celebration.

As a side note, I served several additional hors d' oeuvres including Greek olives, large black olives (the kiddos love to put them on their fingers :), Rollingstone Chevre Pistachio cheese and Rollingstone Herbed Chevre with La Panzanella Croccantini crackers, and almonds with cranberries, honey and sea salt by Sahale Snacks. We ate like kings and queens today!

Recipe Source:
yummly.com

Monday, November 21, 2011

Caramelized Brussels Sprouts With Bacon and Cider


Photo Courtesy of Brad Lovejoy

I don't believe I had eaten brussels sprouts since early childhood until last week. I have always thought of them as cute little cabbages that I have no desire to eat. My brother was in Seattle for a visit and we took him to a West Seattle restaurant called Blackboard Bistro that by the way, is fantastic. The restaurant's menu consists of small plates that are meant to be shared by the whole table. I love this type of dining because you can order three or four items to really get a feel for the style of food. My brother happens to like caramelized brussels sprouts with bacon so he recommended that we order the pan fried brussels sprouts with bacon, lemon and sage to start our meal. We also ordered a beautiful salmon dish with baby potatoes and pearl onions, turkey with homemade dumplings and gnocchi with autumn pork ragout and sage. This meal was truly divine and the pan fried brussels sprouts ignited both Brad's and my interest in this vegetable. For tonight's recipe, I decided to try Caramelized Brussels Sprouts With Bacon and Cider. Welcome to my maiden voyage with these "little cabbages."

Ingredients:
1 pound brussels sprouts
4 slices smoked bacon, chopped
1/2 onion, peeled and diced
2 Tbsp butter
1 cup apple cider
1 cup chicken broth
1 Tbsp sugar (more or less depending on sweetness of cider)
salt and pepper

Bring 3 quarts water to boil in medium saucepan. Blanche brussels sprout halves in boiling water for 2 minutes, covered. Drain and rinse in cold water.

Photo Courtesy of Brad Lovejoy

Over medium heat, melt 1 tablespoon butter in medium saute pan. Add bacon and onion. Saute until bacon is nearly cooked and onion is translucent, about 5 to 8 minutes. Push bacon and onion to side of pan and place brussels sprouts in pan in single layer, with cut side down. Leave in pan without stirring, letting them brown slightly, about 5 minutes.

Photo Courtesy of Brad Lovejoy

When they have caramelized, add cider, chicken broth and sugar. Turn heat to medium-high and bring mixture to medium boil. Cook until liquid has reduced to a glaze and brussels sprouts are cooked. If liquid reduces before brussels sprouts are tender, add additional liquid.

Taste for salt level and season with salt and pepper. Add more sugar if desired. Remove from heat and stir in remaining tablespoon of butter until incorporated into glaze.

These were nothing like the brussels sprouts we had at Blackboard Bistro but they were tasty for sure. The flavor was probably more saturated than any dish I have prepared up to this point. The bacon soaked up the sweetness of the cider and sugar, which was delicious, but it did prevent the bacon from being in the forefront. Brad suggested that perhaps the bacon should be kept separate from the brussels sprouts and cider until the liquid was fully reduced. I think this is a brilliant suggestion because the smokiness of the bacon would then shine through to balance the sweetness. Even without this slight change, we enjoyed the recipe immensely.

I served the brussels sprouts as a side dish with chicken and rice. I of course, did not eat chicken, but instead ate a Quorn meatless Chik'n Cutlet. I know I have touched on the Quorn brand of meat substitute products in the past but I am going to get on my soapbox again. This company, along with Field Roast, makes my favorite meat substitute products. If you are looking for a way to take meat out of your diet and you don't choose to depend on tofu, you should look for Quorn products in the frozen food section of your grocery store. You can also click on the link to their website to see the products they offer. As information, we highly recommend the Gruyere stuffed Chik'n Cutlets.

Recipe Source:
food.com

Sunday, November 20, 2011

Crispy Roasted Chickpeas (Garbanzo Beans)


Photo Courtesy of Brad Lovejoy

I found my new guilty pleasure today. Have you checked out the website called Pinterest? It is an online pinboard to "pin" and share anything and everything that makes you happy. For example, if you see a recipe you like, you can pin and feature it on your pinboard. If you see a fashion photo or interior space that inspires you, pin it as well. The possibilities are endless. I see it as an online collage where I can feature my interests and inspirations. I signed up to become a member but there is a waiting list. I anticipate it will be a short while before I can start creating my own pinboards. Until then, I am thoroughly enjoying checking out boards created by current members.

I was perusing one of the boards today and I came across this recipe for Crispy Roasted Chickpeas. What a fabulous idea! I can't believe I haven't been introduced to preparing garbanzo beans in this manner. I am always on the hunt for healthy snack ideas and since I am a huge fan of crunchy snacks, this provided immediate appeal. After finding this recipe, I googled additional information and ended up finding a few sites that provided roasting tips. The recipe below contains one simple way to season the chickpeas but I also included several other seasoning ideas at the end of this entry.

Ingredients:
1 15-ounce can garbanzo beans (I used Natural Directions organic beans)
1 1/2 Tbsp olive oil
kosher salt
cajun spice blend or spice blend of your choice

Preheat oven to 400 degrees. Drain can of garbanzo beans in strainer and rinse with water to clean beans. Shake and tap strainer to remove excess water. Lay paper towel on baking sheet and spread beans over towel. Use a second paper towel to gently press and absorb water from top of beans. Roll beans around with paper towel and remove thin skin from beans. Discard skins and paper towels.

Drizzle olive oil over beans and use hands or spatula to toss around and coat.

Photo Courtesy of Brad Lovejoy

Roast for 30-40 minutes until beans are deep golden brown and crunchy (chickpeas can sometimes pop like popcorn so don't be surprised). Make sure that beans do not burn. Season with salt and spice blend to taste.

Photo Courtesy of Brad Lovejoy

Oh my goodness! Crispy chickpeas, where have you been all my life? I love, love, love them prepared this way! The final product possesses a crispness that worked beautifully and the spice flavors were right up my alley. I chose to use garlic flakes, chili powder, chipotle and sweet paprika that I ground in my mortar and pestle. I am now motivated to try several of the additional spice blends, located on the list below; especially the tarragon, fennel, roasted garlic, honey and lemon juice blend. If you try any of the other spice blends, let me know what you think. One last side note, you might as well plan to double the recipe because these chickpeas seem to disappear at a fairly rapid rate. Enjoy!

15 ways to flavor roasted chickpeas:
-garlic, pepper, rosemary
-soy sauce, sesame oil, chili powder
-tomato juice, curry powder
-brown sugar, rosemary, cayenne pepper
-cinnamon, cumin, chipotle powder, smokey sea salt, smoked paprika
-coriander, cumin, chili powder, sweet paprika, cinnamon, allspice, ginger, cayenne pepper
-lime juice, chili powder, pepper, cilantro
-sage, roasted garlic
-agave, basil, white pepper, cinnamon
-peanut flour, salt
-maple syrup, apple cider vinegar, nutmeg, ginger, cinnamon
-honey, cinnamon
-apricot jam, wasabi paste, horseradish
-tamari, rosemary, lemon juice, agave
-tarragon, fennel, roasted garlic, honey, lemon juice

Recipe Sources:
steamykitchen.com
thekitchn.com

Thursday, November 17, 2011

Baked Butternut Squash


Photo Courtesy of Brad Lovejoy

If I had to name one ingredient that best evokes fall, I would choose squash. I happen to have thoroughly enjoyed every variety of squash I have eaten. This list includes Acorn, Butternut, Pumpkin, Spaghetti, Green Zucchini, Yellow Zucchini, Crookneck, Pattypan, Italian, Banana and Kabocha. I purchased two Butternut Squash at the pumpkin patch last month and in the spirit of next week's holiday, I decided it was time to turn the squash into something delicious.

Before I came across this Baked Butternut Squash recipe, I learned a few interesting side notes about squash. First, there are two classifications of squash; summer and winter. The terms "summer" and "winter" can be confusing. Summer types are grown in the summer but on the market all year. They are thin-skinned. Winter types are grown winter through spring and are available late summer and fall, into winter. They are thick-skinned. Second, squash leaves and shoots are edible and they are particularly good in soups and omelets. How fabulous is that? Makes me want to run out and buy a squash that still has the leaves and shoots attached just to try it out. For now, I will continue with the recipe at hand.

Ingredients:
1 large butternut squash, pared and cut into 1 inch cubes (remove seeds and fibers)
1/4 tsp cinnamon
1/4 tsp nutmeg (I used freshly grated nutmeg)
1/3 cup brown sugar (I ended up using 1/2 cup)
1/3 cup melted butter
2 tsp lemon juice (fresh is recommended)

Place squash cubes in 2-quart casserole or baking dish. Sprinkle with spices and brown sugar. Drizzle with melted butter and lemon juice. Bake uncovered in 375 degree oven for 45 minutes or until tender. Makes 4 servings.

Photo Courtesy of Brad Lovejoy

This recipe is most likely the easiest recipe I have prepared thus far. The only aspect of preparation I would change is to purchase the butternut squash in cubed form instead of cubing it myself. I have never cut into a butternut squash and I have to admit, I found it more difficult than anticipated. In hindsight, I should have started off with a hacksaw instead of my Henckels Santoku knife. :) Even with this slight curveball, preparation was simple and pleasant. The flavors however, were anything but simple. The fresh quality of the squash married well with the richness of the butter, sweetness of the brown sugar and savor quality of the nutmeg and cinnamon. The squash not only tasted good, it smelled heavenly as it baked in the oven.

Recipe Source
cooks.com

Sunday, November 13, 2011

Linguine with Turkey Meatballs and Quick Sauce

Photo Courtesy of Brad Lovejoy

Autumn is officially in full swing at my house, comfort food and all. I have been pouring over seasonal cookbooks and magazines in search of soup, pasta and one-pot recipes that exude warmth. The recipe that excited me the most is a Turkey Meatball recipe from one of my favorite Italian cookbooks by Giada De Laurentiis. I am not a stranger to preparing meatballs but it has been years since I have done so. I have also never made them with turkey so this was an obvious choice for my next culinary experiment. The recipe follows:

Ingredients:
3 Tbsp olive oil
2 oz pancetta, finely diced
1/2 yellow onion, finely diced
1 lb ground turkey, preferably dark meat
1/2 cup freshly grated Romano cheese
1/4 cup chopped fresh flat-leaf parsley
1/4 cup plain bread crumbs
1/4 cup chopped sun-dried tomatoes
2 eggs, lightly beaten
3/4 tsp salt
3/4 tsp freshly ground black pepper
1 lb linguine
1/4 cup extra-virgin olive oil
1 (28-oz) can whole San Marzano tomatoes, drained and cut into pieces with kitchen scissors
2 whole garlic cloves, peeled
1/4 cup chopped flat-leaf parsley
1/2 tsp salt
1/2 tsp freshly ground black pepper
1/3 cup finely chopped fresh basil

To make meatballs, preheat oven to 450 degrees. Heat olive oil in medium to heavy duty skillet over medium heat. Add pancetta and cook for 2 minutes. Add onion and continue to cook until pancetta is crisp and onion is tender, about 4 minutes more. Remove from heat and let cool.

In large bowl, combine pancetta and onion mixture with remaining meatball ingredients and stir to combine.


Form turkey mixture into balls about 2 inches in diameter, using about 2 tablespoons for each, and place on foil-lined and greased baking sheet. Bake for 20 minutes.


Bring large pot of salted water to boil over high heat. Add pasta and cook until tender but still firm to the bite, stirring occasionally, 8 to 10 minutes. Drain, reserving 1 cup of pasta water. Meanwhile, in medium saucepan, warm 1/4 cup olive oil over medium heat. Add tomatoes, garlic cloves, parsley, salt and pepper and cook for 10 minutes. Discard garlic cloves. Add cooked meatballs and cooked pasta and toss to coat. Add reserved pasta water, about 1/4 cup at a time, if pasta needs moistening. Arrange on serving platter and top with basil.

Okay, all I have to say about this one is YUM! We loved this recipe. I am not particularly fond of sun dried tomatoes but I found an application in which they work for me. The saltiness of pancetta paired beautifully with the sweetness of the sun dried tomatoes. I also went out on a limb and purchased natural turkey that is ground on premises by Metropolitan Market. I usually choose ground turkey breast but this recipe recommended darker meat. I decided to go with it and boy, I could taste a difference. Darker turkey meat is richer than white meat (I'm sure this is caused by the extra fat content) and the flavor is more intense. I am not converted to regular ground turkey for every occasion but I will definitely return to it when I prepare turkey meatballs.

I think my favorite part of this dish is the Marzano tomatoes. They have such a sweet quality but there is still something savory about the flavor. Combined with garlic, olive oil and fresh parsley, they were absolutely delicious. I give this recipe double thumbs up but be warned that it could feed an army. We are going to eat it tomorrow for dinner and as a matter of fact, we may have two friends come over to help us finish it off. If you are having a medium to large group over for dinner, this is the perfect dish to serve. Make a dinner salad, this linguine dish, open a bottle of Malbec (I am speaking from experience...... I am still sipping on my glass of Columbia Winery wine club Malbec as I write) and you will have a perfect dinner party. Oh, and please remember to invite me if you decide to prepare this dish. I will be there with bells on my toes.

Recipe Source:
"Everyday Pasta" by Giada De Laurentiis
Pages 177-178

Sunday, November 6, 2011

Quinoa Stuffed Bell Peppers


Photo Courtesy of Brad Lovejoy

I know many people associate stuffed bell peppers with the soggy, meat and rice-filled green bell peppers of their youth, but I am one of the people that actually loves stuffed bell peppers in just about any form. Prior to excluding beef from our diets, I would make green bell peppers stuffed with lean ground beef, brown rice, red sauce with herbs; topped with cheddar cheese. This was one of my stand-by recipes that I knew would always make a tasty meal. After we stopped eating beef, I started to experiment with vegetarian and turkey variations of the recipe. I never however, thought about changing out the starch for something other than rice.

When I was reading the precursor for these Quinoa Stuffed Bell Peppers, I was immediately drawn in because the author presents the recipe as a template to experiment with various ingredients and flavor combinations. Basically, you can choose the type of pepper, starch, vegetables, herbs and cheese you would like to use to create a dish that suits your palate. This breed of recipe is right up my alley because I now have an interest in experimenting with cooking. I was formerly afraid to take creative license with recipes but I am finally feeling a bit more confident.

Tonight, I chose to follow the recipe with the exception of a few small changes. Instead of using a fresh chile pepper, I used red pepper flakes in order to control the level of heat. I also chose to use small chunks of jack cheese instead of feta or goat cheese. We enjoy both feta and goat cheese but I wanted to use a less creamy, more melty (a new word for my culinary dictionary) cheese for the dish. I also used all organic ingredients with the exception of the jack cheese, which was all-natural but not organic. Recipe follows:

Ingredients:
1/2 cup red or white quinoa, rinsed in sieve; rice, pearl barley or instant couscous also work
4 orange, yellow or red bell peppers, sliced in half lengthwise
1 cup water
3 Tbsp olive oil
1/4 cup shallots or red onion, diced
2 to 3 garlic cloves, finely chopped
1 1/2 cups fresh (from 2 medium-sized ears) or frozen corn kernels
1 chile pepper, stemmed, seeded and finely diced
4 cups spinach, washed well, stemmed and roughly chopped; chard or kale can be used as well
1/4 cup fresh cilantro, basil or flat-leaf parsley, finely chopped
salt and freshly ground black pepper
1/2 cup crumbled feta cheese (or queso fresco, ricotta, goat cheese or no cheese at all)
1/2 lemon (optional finishing touch)

Preheat oven to 400 degrees. In small saucepan, bring 1 cup water to boil for quinoa. (Water amounts will vary for starch options; prepare according to package instructions.) Add pinch of salt, then add quinoa. Stir, then cover and simmer over low heat until grains are tender and begin to look starry and luminescent, about 15 minutes. Turn off heat and set aside.

Carefully remove seeds and membranes of peppers. In large saucepan, bring 6 cups water and 1 teaspoon salt to lively simmer (not rolling boil). Add pepper halves (submerge peppers cut side first) and simmer until slightly tender, about 5 minutes. Using tongs, remove peppers and drain excess water. Transfer to baking dish for later.

In large skillet, heat 2 tablespoons oil. Add onion and chile pepper (I used 1 teaspoon red pepper flakes), and cook over medium heat for 3 minutes, until slightly softened. Add garlic, corn and greens, plus 2 tablespoons water, and cook until greens are wilted, about 5 minutes.

Photo Courtesy of Brad Lovejoy

Stir in herbs and quinoa and mix everything together until well combined. Taste for salt and pepper, and season as you see fit. Fill peppers with filling and dot with cheese, if using. Drizzle remaining oil over peppers and bake for about 20 minutes.

Photo Courtesy of Brad Lovejoy

Serve hot or at room temperature, squeezing lemon over top, if you wish. Makes 4 servings.

We thoroughly enjoyed this dish. The filling was savory but it had a fresh, nutty quality. I would even cook the filling by itself as a full meal or side dish; that's how good it was. The corn that I used in the filling was purchased a few weeks ago at a local farm stand. It was fresh and sweet because I zipped it and froze it immediately after purchase. I chose to use cilantro instead of parsley, which worked out well. I loved the way it complimented the flavor of the peppers. Finally, we liked the jack cheese but I would definitely try a variation of the recipe with goat cheese. The McCoys dined with us last night and we decided collectively that my next experiment would be poblano peppers stuffed with bulgur wheat or brown rice, spinach, corn, cilantro and goat cheese; topped with homemade enchilada sauce. Doesn't this sound heavenly? Can't wait to try it!

I served the stuffed peppers with an organic kale salad that I dressed with a mixture of olive oil, red vinegar, garlic, kosher salt and pepper.

Recipe Source:
"The Meat Lover's Meatless Cookbook" by Kim O'Donnel
Pages 98-99

Sunday, October 30, 2011

Braised Pork and Coconut Soup


Photo courtesy of Brad Lovejoy

This recipe captured my interest the second I laid eyes on the title. Pork and coconut together in one pot? This could be my personal culinary heaven. As I started to read the recipe in detail and saw that two of the ingredients involved peanuts, I was brought back down to earth. I unfortunately have an allergy to peanuts so I have avoided all recipes that include them up until this point. For some reason, I suddenly had an aha moment and decided that cashews could be used in place of peanuts. I was not sure how the flavor of cashew butter and roasted cashews would translate into the soup but I was confident that the textures would at least be similar. With this adaptation in mind, I set out to prepare the following recipe.

Ingredients:
2 1/2 pounds bone-in pork shoulder
1/3 cup packed brown sugar
4 garlic cloves, minced
coarse salt
3 Tbsp olive oil
2 medium onions, finely diced
2 1/4 cups dry red wine
28-ounce diced tomatoes
1/3 cup creamy natural peanut butter
1 quart chicken broth
2 Tbsp balsamic vinegar
1 Tbsp Dijon mustard
2 tsp fish sauce
1 Tbsp fennel seeds
2 tsp aji chile paste or sambal paste
3/4 cup canned coconut milk
freshly ground black pepper
1 small lime, juiced
1/3 cup roasted, salted peanuts, chopped
1/2 cup loosely packed cilantro, chopped

Rub pork with brown sugar, one third of garlic and one teaspoon salt. Place in glass bowl, cover and refrigerate overnight. Preheat oven to 350 degrees.

Heat 1 tablespoon oil in large pot or Dutch oven over medium-high heat. Add pork and brown on all sides. Remove pork and set aside. Add 1 tablespoon more oil to pot and lower heat to medium. Add half of onions and another third of garlic and sweat by cooking until onions are translucent, about 5 minutes. Pour in 2 cups of wine, increase heat to simmer and reduce liquid by half.

Reserve 1 cup of tomatoes and add rest to pot. Add peanut butter, stirring until it melts into the liquid. Add broth, vinegar, mustard, fish sauce, fennel seeds and chili paste. Bring liquid to boil, add pork back in, cover pot and transfer to oven. Braise pork until the meat is very tender, 3 to 3 1/2 hours.

Remove pork from liquid and set aside to cool slightly. Strain liquid and skim off fat with slotted spoon (alternatively, let the liquid cool completely in refrigerator and skim off fat cap that forms once it is cold). Pull meat away from the fat, discarding fat. Cut meat into bite-sized pieces. Heat remaining tablespoon oil in medium pot over medium-low heat. Add remaining onions and garlic and sweat by cooking them until onions are translucent, about 5 minutes. Add remaining 1/4 cup wine, increase heat to medium-high and reduce liquid by half. Add reserved 1 cup tomatoes and strained soup liquid. Simmer to reduce by one third, about 15 minutes.

Stir in meat and coconut milk. Simmer soup for additional 15 to 20 minutes so flavors come together. Season with salt and pepper. Divide soup among bowls, squeeze a bit of lime juice over each serving and sprinkle with chopped peanuts and cilantro before serving.

This is officially one of my top ten culinary masterpieces since I started this cooking project. The recipe also qualified for my top ten most labor intensive endeavors. It all started yesterday afternoon when I applied a rub to the pork and put it in the refrigerator to marinate overnight. Preparation continued over a five hour period today. The recipe had it all; sauteeing, browning, simmering, braising, boiling, reducing and straining. I have to say, I loved every minute of it. This is the type of recipe I truly enjoy preparing. There is something about starting with a long list of ingredients, an even longer set of instructions and ending up with a beautiful meal.

This recipe is particularly interesting because it incorporates Asian and Italian influences. I wasn't sure how fennel, Dijon mustard, red wine, fish sauce, coconut milk, chile paste and balsamic vinegar would meld together but as they slow-cooked, the flavors combined exquisitely. The dish was also aesthetically pleasing and the aroma was a heavenly mix of red wine, fennel and garlic. Finally, the overall flavor and texture were phenomenal. The soup was rich and creamy but most importantly, the flavor was saturated and complex. I didn't even touch on the texture of the pork yet. If you can imagine the most tender pulled pork you have ever eaten, this pork was that good or even better. It practically fell apart in my hands and melted in my mouth.

The only change I made to the recipe was substituting cashew butter and cashews for peanut butter and peanuts. The cashew butter melted easily into the soup and the cashews provided the perfect crunchy element to the final product. If you have a lot of ambition and five hours to burn in the kitchen (figuratively, not literally :), I highly recommend this recipe.

Recipe Source:
"Girl In The Kitchen" by Stephanie Izard
Pages 82-84

Saturday, October 29, 2011

Owl S'mores


Photo Courtesy of Brad Lovejoy

This may very well be the cutesiest recipe I have ever prepared but I just couldn't help myself. Olivia's preschool hosted a Halloween party on Friday and one of the moms brought these Owl S'mores. They were a huge hit with preschoolers and parents alike. Olivia and I both immediately fell head over heels for the cookies and we decided that these would be our Halloween treat this year. Every year, we prepare cookies for our neighbors and friends, which we then hand-deliver. This is one of my favorite holiday traditions. I was not in the mood to make sugar cookies with sprinkles this year, as we have done for the past two years, so inspiration for these Owl S'mores could not have come at a better time. The best part other than the high degree of adorableness? Preparation is quick, simple and only requires a microwave. Enjoy!

Ingredients:
graham crackers
chocolate chips
large marshmallows
yellow candy melts or white chocolate discs
candy corn

Cut one marshmallow in half and place both pieces on square graham cracker sheet (two perforated sections together). Place candy melt or white chocolate disc on top of marshmallows. Heat in microwave for 2 to 5 seconds; just enough to make marshmallows puff up but not to get them too hot. Remove from microwave and place a chocolate chip on each candy melt or disc while still warm. Place candy corn at base of marshmallows. Allow to cool and serve. May be prepared night before serving.

I found two variations for these cookies that make them more s'more-like. The first is to spread chocolate frosting on a second graham cracker and to layer the owl graham cracker on top. This makes a graham cracker frosting sandwich. The second is to melt chocolate on a second graham cracker and then to layer the owl graham cracker on top. We decided to keep our Owl S'mores simple, which kept the sugar content lower and preparation time shorter.

Recipe Source:
livinglocurto.com

Monday, October 24, 2011

Potato, Red Onion and Feta Frittata


Photo Courtesy of Brad Lovejoy

I set out this morning to find a recipe in my new vegetarian cookbook that didn't involve soup or pasta. These are two of my favorite foods so I tend to gravitate toward them to the tune of about 40 percent of the dishes I prepare. I was fortunate to happen upon a fabulous vegetarian cookbook last week at my favorite local used bookstore, Leisure Books, so I decided to peruse the book to see what I could see. I found a recipe for this Potato, Red Onion and Feta Frittata and decided to move forward. The only aspect of the recipe that surprised me is that it doesn't include any herbs or greens. This made my decision for a side dish fairly easy; it needed to be a leafy green. I was craving fresh spinach and Metropolitan Market was offering bunches of lovely, locally grown organic spinach. I also found organic Rainbow Baby Potatoes (purple, red and white; aren't they gorgeous?) and fresh all-natural Feta that were perfect for the frittata.

Photo Courtesy of Brad Lovejoy

Ingredients:
1 1/2 Tbsp olive oil
1 red onion, sliced
12-ounces cooked new potatoes, halved or quartered if large
6 eggs, lightly beaten
1 cup fresh feta cheese, diced
salt and freshly ground black pepper

Heat oil in large, heavy-bottom flameproof frying pan. Add onion and saute for 5 minutes until softened, stirring occasionally. Add potatoes and cook for 5 minutes or more, until golden, stirring to prevent sticking. Spread mixture evenly over base of pan.

Preheat broiler to high. Season beaten eggs, then pour mixture over potato and onion mixture. Sprinkle cheese on top and cook over moderate heat for 5 to 6 minutes until eggs are just set and base of frittata is golden.


Photos Courtesy of Brad Lovejoy

Place pan under broiler and cook top for 3 minutes until lightly golden. Serve frittata warm or cold, cut into wedges.

I haven't yet mentioned that Brad does not necessarily prefer frittatas. He has become an almost non-egg eater since he began eating less meat so I knew making this dinner was a risk. It paid off however, because Brad loved this dish. He joined the clean plate club with his first serving and went back for more. I was fond of this dish as well. The Feta was wonderfully dry and salty, and the potatoes were cooked to the perfect consistency; although I chose to go about cooking them differently than instructed. Because my potatoes were quite small, I simply cut them into halves or thirds and then did not precook them prior to adding them to the onions. I then sauteed the potatoes for 12 minutes instead of 5, which worked well.

The only other adjustment I made to the recipe was to cook the frittata on moderate heat for 3 minutes before putting it under the broiler. I found that the eggs set rather quickly and the bottom was already golden brown after 3 minutes. I then broiled the frittata for 3 minutes, per the recipe, and it was done to perfection. The spinach was lightly sauteed in 3/4 tablespoon of olive oil with a pinch of kosher salt. I also served dinner with orange slices (mostly because we all have colds so I I thought we could use some Vitamin C) but also because it added a fresh and bright element to the meal. I would absolutely prepare this recipe again for dinner or for brunch. If you like a little bit of spice with your egg dishes, try a splash of Cholula Hot Sauce.

Photo Courtesy of Brad Lovejoy

Recipe Source:
"Complete Vegetarian" by Hermes House
Page 296

Saturday, October 22, 2011

Candy Corn


Photo Courtesy of Brad Lovejoy

What is Halloween without a fun cooking project? My friend Heidi, had a great idea to make candy corn with our 3-year-olds, Olivia and Griffin. I have never been a big fan of candy corn but it sounded whimsical and interesting; unlike anything I have prepared prior to today. Heidi and I set out to find a detailed recipe online and came up with the same one by Alton Brown. We figured that if both of us found the same recipe, it must be kismet so we went with it. The recipe follows:

Ingredients:
1 1/4 cups powdered sugar
6 1/2 tsp nonfat dry milk (we used an all-natural product)
1/4 tsp kosher salt
1/2 cup granulated sugar
1/3 cup light corn syrup
2 1/2 Tbsp water
2 Tbsp unsalted butter, room temperature
1/2 tsp vanilla extract (we used organic extract)
2 to 3 drops yellow and orange gel paste food coloring

Combine powdered sugar, dry milk and salt in bowl of food processor. Pulse 4 to 5 times until mixture is smooth and well combined. Set aside.

Combine sugar, corn syrup and water in 2-quart pot. Put over medium heat, cover and cook for 4 minutes. Add butter, clip on candy thermometer and bring mixture to 230 degrees F, about 1 to 2 minutes. When sugar reaches 230 degrees F, take pot off heat and remove thermometer.


Add vanilla and dry mixture, stirring continuously with silicone spatula until well combined. Pour onto half sheet pan lined with silicone baking mat. Cool until mixture is cool enough to handle, about 10 to 15 minutes.

Divide dough into three equal pieces. Add 2 drops yellow food coloring to one piece and knead dough until color is consistent throughout. Add 2 drops orange to second piece and knead until color is consistent. Leave third piece white. Roll each piece of dough into a strand, about 18-inches long. Cut each strand in half.

Roll one of white pieces into a strand about 1/2-inch thick and about 22-inches long. Repeat with yellow and orange pieces. Lay strands side by side and press them together with fingers. Cut combined strand into 4-inch pieces. Lays strands, one at a time, onto silicone mat and press into wedge shape, like a triangle. Use wire butter slicer, metal scraper or knife to cut candies into pieces. Repeat procedure with remaining dough. Lay finished pieces on parchment or waxed paper to dry for one hour. Store in airtight container with parchment paper between each layer.

We had such a good time! The kids were really into it and they were absolutely adorable to watch. They loved measuring ingredients, stirring, kneading and especially tasting. They were in charge of quality control the whole way through and I must say, they did a great job. Homemade candy corn tastes so much better than store bought! The texture is much softer and the flavor of vanilla shines through. If I knew candy corn could taste this good, I would have made it years ago.

One of my favorite parts of this recipe however, was the fact that the kids both chose their favorite colors for the candy instead of the classic orange and yellow. My inclination was to only give them orange and yellow, but Heidi thought it would be better to ask Olivia and Griffin to choose their own colors. I am glad we did it Heidi's way because I think the combination of green, pink and white made the prettiest candy corn I have ever seen. I must give kudos to Heidi because she has some mad candy-making talent. Although this was her maiden candy corn voyage, she was rolling the dough like a pro. :)


Recipe Source:
Alton Brown for foodnetwork.com

Wednesday, October 19, 2011

Curry Green Onion and Curry Pineapple


Photos Courtesy of Brad Lovejoy

Tonight I decided to tap into my Grammie's vast cooking knowledge and enormous library of gourmet recipes. To say that my grandma has a large cookbook collection is a gross understatement. Let's just say she is the only person I know with a built-in bookcase that stretches across an entire wall and is used exclusively to house cookbooks. She would need to comment on the exact cookbook quantity but I am telling you, if you are looking for a type of cuisine, a particular recipe or you want to learn about the cooking in a specific region of a specific country, my Grammie's library is the place to go.

In addition, I can't even begin to list all of the countries she has lived in and/or visited. With her extreme interest in cooking and her raw talent, she has been able to learn to prepare cuisines from all over the world. This leads me to my point which is that she shared two curry recipes with me. She originally learned both dishes from one of her friends while living in Sri Lanka. I chose both recipes to prepare for tonight's dinner.

The first dish I prepared is Curry Green Onion and the second dish is Curry Pineapple. My Grammie also sent a formula for making my own curry powder but I will save that for another time. For tonight's recipes, I used curry powder that I already had on hand. Before I make further comment on the recipes, I will provide them for review.

Curry Green Onion-
Ingredients:
1 bunch green onions
2 medium tomatoes, sliced thinly lengthwise
1 tsp curry powder
1/2 tsp chile powder
2 tsp butter
salt to taste

Mix all ingredients in saucepan and allow to cook over low heat until cooked down; well done. Serve as side dish or with Naan bread.

Curry Pineapple-
Ingredients:
1 20-ounce can pineapple chunks, drained
1/4 onion, chopped
1/2 tsp chopped garlic
small amount of chopped ginger (approximately size of a quarter)
1 tsp chili powder
1 tsp curry powder
1 cinnamon stick broken in half
about 3 Tbsp cooking oil (I used Canola)
1-2 tsp sugar

Mix all ingredients in saucepan and add about 3 tablespoons of oil. Simmer until onions and garlic are soft and pineapple is coated. When cooked, stir in sugar and serve.

The consensus is in. Both recipes were delicious! I especially liked the Curry Green Onion dish because I love tomatoes and I tend to prefer savory dishes to sweet dishes (unless we are talking dessert, of course). The green onions paired nicely with the tomatoes and the addition of butter to provide creaminess worked beautifully. I would not change anything about this recipe.

The Curry Pineapple dish was delicious as well but I found myself wishing there was a bit less oil. I would reduce the amount of oil to 1 or 1 1/2 tablespoons, which would change the consistency a bit but I believe it would be more to my liking. What did work well in this recipe however, is the combination of cinnamon, curry, chili powder and ginger. The flavor profile was tasty and definitely up my alley. I served both dishes with All-Natural, Hand-Stretched Tandoori Naan by a company called Stonefire Authentic Flatbreads. I served the Curry Green Onion with Garlic Naan and the Curry Pineapple with Original Naan. Thank you Grammie, for inspiring such a lovely dinner!

Recipe Source:
Mary Moore (a.k.a. Grammie extraordinaire)