I had tremendous aspirations to cook and keep my blog up while on Maui for two weeks but I have decided to keep it real instead. I am now officially on Maui time and I don't feel like associating with anything that vaguely resembles obligation. Golfing, playing tennis, laying by the pool, walking on the beach with Brad and Olivia and basically doing whatever we want when we want have taken over all former priorities. Can you blame a girl for wanting to relax? :)
I will continue my cooking adventure where I left off when I return to Seattle on May 10th. Mahalo for your understanding and aloha until the 10th!
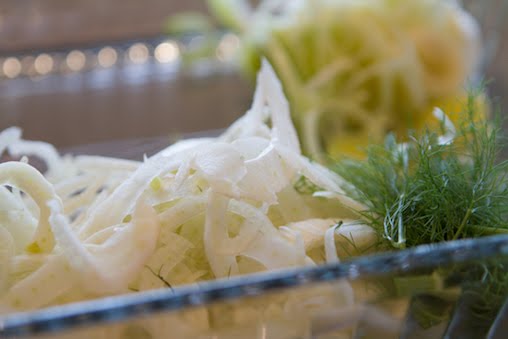
Fennel and Leeks
Saturday, April 30, 2011
Sunday, April 24, 2011
White Bean Dip With Rosemary Olive Oil

Photo Courtesy of Dave McCoy Photography
No time to waste this week! We are taking off on Tuesday for our annual two-week trip to Maui so I needed to get right on the cooking train. We met my in-laws for a beautiful brunch at Salty's on Alki this morning so we knew we wouldn't be super hungry tonight. By the way, for those of you that aren't Seattleites, Salty's is a restaurant located over the water in West Seattle that looks directly across the sound at the Seattle skyline. Not only is the view one of the best in Seattle, the food is incredible. Brad and I are frequent flyers at Salty's because it never disappoints. I am digressing from the task at hand because I want to mention that I had the best Bloody Mary of my life during brunch today. Salty's offers a build-your-own Bloody Mary bar and boy did I build one! First of all, I chose bacon infused vodka. I know it sounds strange, but bacon with bloody mary fixings just couldn't be bad. Next, I went to the Bloody Mary bar and chose their horseradish mix. Then I added two bleu cheese stuffed olives, two pimento olives, salami rolled around a cornichon (small pickle), extra horseradish and a splash of Worcestershire Sauce. Ridiculously good! I, of course, had to snap a photo of the build-your-own Bloody Mary bar. They thought of every option a person could possibly want as a Bloody Mary accoutrement. Check out the photo below.

Okay, back to the White Bean Dip With Rosemary Olive Oil. This was actually a perfect dip for pita chips. The recipe is as follows:
Ingredients:
1/4 cup olive oil, divided
2 garlic cloves, peeled and minced
2 cans white beans (Canellini or Great Northern), drained and rinsed
2 Tbsp fresh lemon juice
2 tsp kosher salt
3 sprigs fresh rosemary, rinsed
1. In a 10-inch frying pan over medium heat, stir half the olive oil and the 2 cloves garlic until fragrant, being careful not to brown garlic, about 1 minute. Pour the oil and garlic into a food processor. Wipe out the pan and set aside.
- 2. Add white beans, lemon juice, and salt to the food processor and whirl until smooth. Pour into a serving bowl.
- 3. Return the frying pan to medium heat and add the remaining 2 tablespoons olive oil and the rosemary sprigs. Warm the rosemary in the olive oil until fragrant, about 3 minutes, stirring occasionally so the rosemary doesn't burn. Remove from heat and let cool 10 minutes.
- 4. Set the rosemary aside and drizzle the olive oil over the bean dip. Mince one teaspoon of the rosemary leaves and sprinkle over the dip.
The McCoys were over for dinner tonight and we all agreed that the dip is delicious but we would use 1 1/2 tsp of kosher salt instead of 2 tsp. The consistency of the dip was perfection but the most special part of the recipe is the rosemary infused olive oil. As I tasted it, I had an epiphany that I should infuse olive oil with herbs more often. It only takes about ten minutes to infuse herb flavor into oil so I really have no excuse moving forward. I would definitely make this dip as an hors d'oeuvre for a dinner party. Viva La White Bean Dip!
Saturday, April 23, 2011
Week Sixteen Recap
Another successful and fun week of cooking! Yippee for me! I only say this, of course, because I was questioning my cooking ability when I started this project sixteen weeks ago. As I near the halfway point, I am proud of both the fact that I have stuck with the project and that I am actually becoming a decent cook. So, here's to another week of great meals. Can't wait to see what next week brings!
Rustic Sausage and Spinach Polenta Casserole
"The Best One-Dish Suppers" by Cook's Illustrated
Pages 107-108
Vegetable Tian
"Barefoot In Paris" by Ina Garten
Page 146
Banana Sour Cream Waffles
grouprecipes.com
Banana Sour Cream Waffles
The irony in the number of banana related recipes I have prepared is immeasurable. I have written in the past about my former banana neurosis so I still marvel at the fact that I am now enjoying bananas in several different forms. For the third time since I started this cooking adventure, I prepared a recipe that centered around bananas.

I knew I wanted to make waffles for my third recipe this week but I had no idea what type of waffles I wanted to make. Once again, I used my good friend Google and I happened upon this recipe for Banana Sour Cream Waffles. Doesn't it just sound interesting upon first glance? Perhaps you immediately questioned whether this recipe sounds appetizing, as I first did. Once I got past my initial reaction, I decided that this recipe addressed my biggest complaint about waffles, which is that they are often dry. If sour cream, milk and melted butter don't combat dry waffles, I don't know what will. So, I set off to test this recipe.
Ingredients:
I cup flour
1/2 Tbsp sugar
1 tsp baking powder
1/4 tsp baking soda
1/4 tsp salt
1 egg, separated
1 cup sour cream
1/4 cup milk
1/4 cup butter, melted
1 mashed banana
Sift dry ingredients together in medium bowl. Set aside. Mix together beaten egg yolk, milk, sour cream melted butter and mashed banana. Add to flour mixture, mixing well. Fold in whipped egg white. Pour batter into oiled waffle iron. Cook each side until brown.

These waffles were delicious and they were truly the antithesis of dry. I served them topped with a few bananas sliced on the diagonal and organic pure maple syrup. Brad and Olivia enjoyed the waffles as well. I would absolutely prepare it again. Kudos to grouprecipes.com for publishing this recipe.
Friday, April 22, 2011
Vegetable Tian

Let me just start out by saying YUMMY!!! This recipe is fantastic. This is my first Barefoot Contessa (Ina Garten) recipe and I am extremely pleased with the results. I chose Vegetable Tian, which is a French Provincial dish from her "Barefoot In Paris" book. It is possible that I was a tad bit partial to the recipe before I even tasted it because I love all things Parisian. I travelled through Paris in 2002 and absolutely fell in love with the cityscape, museums and food. I dream about going back with Brad and Olivia someday so I can share my love of the city with them and discover so much more than my four day visit allowed me to discover. The Vegetable Tian ingredients are simple but when combined, they are pure and flavorful.
Ingredients:
Good olive oil
2 large yellow onions
2 garlic cloves, minced
1 pound medium round potatoes, unpeeled
3/4 pound zucchini
1 1/4 pounds medium tomatoes
1 tsp kosher salt
1/2 tsp freshly ground pepper
1 Tbsp fresh thyme leaves, plus extra sprigs
2 ounces Gruyere cheese, grated
Preheat oven to 375 degrees. Brush 9 X 13 X 2 inch baking dish with olive oil. In medium saute pan, heat 2 Tbsp olive oil and cook onions over medium-low heat for 8 to 10 minutes, until translucent. Add garlic and cook for another minute. Spread onion mixture on bottom of baking dish.
Slice potatoes, zucchini and tomatoes in 1/4 inch slices. Layer them alternately in dish on top of onions, fitting them tightly, making only one layer. Sprinkle with salt, pepper, thyme leaves and thyme sprigs and drizzle with 1 more Tbsp olive oil. Cover dish with foil and bake for 35 to 40 minutes, until potatoes are tender. Uncover dish, remove thyme sprigs, sprinkle cheese on top and bake for 30 minutes, or until browned. Serve warm.
Barefoot Contessa recommends that the potatoes, zucchini and tomatoes have roughly the same diameter so the slices look similar. I found it difficult to find tomatoes that were as small as the zucchini and potatoes so I ended up cutting each tomato slice in half. I layered the tomatoes with the rounded side up so the vegetables looked as uniform as possible. Barefoot Contessa also recommends Yukon Gold potatoes for this particular recipe and after tasting the dish, I second this recommendation. Yukon Golds are the perfect consistency and sweetness to compliment the tomatoes and zucchini. Brad only eats tomatoes in salsa and spaghetti/pizza sauce form so I was quite unsure of what his reaction might be. Much to my surprise, he liked the tomatoes! He decided that he doesn't mind the flavor and consistency of cooked tomatoes, which is a groundbreaking discovery as far as I am concerned.
In a nutshell, this recipe is delicious and I will prepare it as a side dish in the future. I served it with a vegetarian meat substitute stuffed with Gruyere cheese by a company called Quorn. They make many forms of meat substitute products including cutlets, ground "meat", burger patties, nuggets, roasts and stir fry strips. I love these products because they are soy free. I happen to have soy allergies so most meat substitute products have been out of my reach in the past. Between Field Roast and Quorn, my meat substitute prayers have been answered. I am including the Quorn website in my list of favorites for your review. Even as non-vegetarians, we often choose Quorn products above meat products. We particularly recommend the Gruyere stuffed cutlets.
Monday, April 18, 2011
Rustic Sausage and Spinach Polenta Casserole

Quick cooking polenta, where have you been all my life? Oh my goodness I have missed out up until now. Tonight's recipe was Rustic Sausage and Spinach Polenta Casserole. I am seriously madly in like with creamy polenta. I am going to move directly into the ingredients and cooking instructions and then I will share my thoughts. This one was honestly so fantastic that I can't wait to write about it. Here goes:
Polenta Ingredients:
5 1/2 cups water
1 1/2 cups instant (quick cooking) polenta; I used Bob's Red Mill coarsely ground Polenta
Salt and ground black pepper
3 ounces Parmesan cheese, grated (1 1/2 cups)
2 Tbsp unsalted butter
1 medium garlic clove, minced or pressed (about 1 tsp)
Topping Ingredients:
1 Tbsp olive oil
1 medium onion, minced
Salt and ground black pepper
1 1/2 pounds sweet Italian sausage, casing removed
6 medium garlic cloves, minced or pressed (about 2 Tbsp)
1/4 tsp red pepper flakes
1 14.5 ounce can diced tomatoes
8 ounces curly-leaf spinach, stemmed, washed and chopped coarse
1 Tbsp red wine vinegar
3 ounces Parmesan cheese, grated (1 cup)
2 Tbsp minced fresh parsley
Adjust oven rack to middle position and heat oven to 400 degrees.
For Polenta: Combine water, polenta and 1 1/2 tsp salt in large bowl, cover and microwave on high power until most of the water is absorbed, 8 to 10 minutes. Stir polenta thoroughly; then continue to microwave uncovered until creamy and completely cooked, 1 to 3 minutes longer. Stir in Parmesan, butter, garlic and salt and pepper to taste. Cover to keep warm, set aside.

For Topping: Meanwhile, heat oil in 12-inch skillet over medium-high heat until shimmering. Add onion and 1/2 tsp salt and cook until softened, about 5 minutes. Add sausage and cook, breaking meat into large chunks with wooden spoon, until lightly browned, about 10 minutes. Stir in garlic and red pepper flakes and cook until fragrant, about 30 seconds.
Add tomatoes with juice, bring to simmer and cook, stirring occasionally until the flavors blend, about 5 minutes. Stir in spinach, a handful at a time, and cook until wilted, about 2 minutes. Off the heat, stir in vinegar and season with salt and pepper to taste. Smooth cooked polenta evenly into a 13 X 9 inch baking dish. Carefully spoon sausage mixture on top of polenta and sprinkle with Parmesan. Bake until polenta is heated through and cheese is melted and just beginning to brown, 15 to 20 minutes. Let casserole cool for 10 minutes, then sprinkle with parsley and serve.
This recipe had me at polenta. I have only purchased pre-packaged polenta in roll form in the past so this was my maiden voyage making it from grit form. I was first of all, apprehensive about cooking polenta in the microwave. I have not yet prepared a recipe that called for microwaving any ingredient so I was a bit wary. Upon reading further explanation of the recipe, I learned that Cook's Illustrated did many trial preparations of polenta before coming up with this one. There is a reason they microwaved it......the polenta was fantastic this way. I don't know what I was thinking by questioning Cook's Illustrated. They have been right on the money for me every time. Let me just say that if I am to be honest, you could have given me a shovel to scoop the polenta directly into my mouth before I even added the Parmesan and butter. It was just creamy and beautiful.
Now, onto the topping. Sweet Italian sausage is not the lowest fat food you can eat but that is exactly what made it such a treat. I purchased Metropolitan Market's handmade pork sausage and the flavors were fresh and vibrant. After adding the other beautiful ingredients, including dark green organic spinach, there was no way to go wrong. Brad, Olivia and I were enamored with the polenta layer. Brad said it added a lightness to the richness of the sausage layer. I think I may be turning my husband into a foodie :).
One last side note, Cook's Illustrated provided a vegetarian recommendation for this recipe. For the vegetarian version, they substituted a combination of cremini mushrooms with dried porcini mushrooms. Sounds wonderful to me. I would also recommend leaving the sausage out of the recipe and serving it with a spinach and tomato only topping.
I would absolutely make this recipe again and again. More than that, I have found a new starch to work with. I think I have gone cuckoo for polenta so don't be surprised if you see it a few more times in the near future.
Saturday, April 16, 2011
Week Fifteen Recap
The theme of this week was simplicity and I have to admit, simplicity can be quite delightful. I started with Shrimp In Garlic Sauce and it did not disappoint. The Green Fruit Salad was light, healthy and delicious and finally, my Grilled Cheese With Brie and Pear was great. Yes, the week started with me feeling as though I needed to have an easy week of cooking but it has ended with me learning that easy food can be just as fabulous as the fancy schmancy stuff. Here's to many more simple yet delicious dishes! This is the week fifteen recap:
Shrimp In Garlic Sauce
"Quick From Scratch Seafood" by Food & Wine Magazine
Page 115
Green Fruit Salad
"Simple But Perfect Salads" by Love Food, Paragon Books Ltd
Page 209
Grilled Cheese With Brie and Pear
Every Day with Rachel Ray Magazine, May 2011
Pages 152-153
Brie and Pear Grilled Cheese
For my final recipe for the week, I chose grilled cheese sandwiches with brie cheese and pear slices. The inspiration for choosing this recipe was actually not an inspiration at all. I had originally planned to make an onion frittata but I was easily sidetracked today. My friend Elise and I decided to go to lunch and then spend the remainder of the day walking around the West Seattle Junction. We had a few cocktails, shopped and all of the sudden, it was 4:30. Dave, Natalie and Nessa were coming over at 6:30 for dinner but I hadn't yet shopped for the frittata ingredients. I called Brad to have him read the recipe to me over the phone but he and Olive were taking a nap. As a result, I needed to come up with a new recipe fairly quickly. Elise and I went to QFC to the magazine aisle and started looking through cooking magazines for a recipe. Elise found a section about grilled cheese sandwiches in Everyday with Rachel Ray magazine. I immediately found a version of grilled cheese with brie and pear and I was good to go. The recipe is as follows:
Ingredients per sandwich:
2 tsp unsalted butter, room temperature
2 slices soft white sandwich bread (I chose locally baked sour dough)
1 1/2 ounces brie
sauteed pear slices
chopped walnuts or almonds
Spread brie on bread and add sauteed pear slices. Place one bread slice butter side down in skillet. Top with cheese and pear slices and second bread slice, butter side up. Cook for 2 minutes. Flip carefully using wide metal spatula, then cook for 2 additional minutes on second side; bread should be barely browned. Repeat, cooking for about 2 minutes more on each side, until golden. Cut in half and dip sandwiches' cheesy cut sides into chopped walnuts or almonds for crunch.
I decided to serve the sandwiches with a green salad. I chose a simple organic green salad mix and added organic radishes, avocado and roasted pumpkin seeds. For salad dressing, I mixed grape seed oil, locally made balsamic vinegar by Rockridge Orchards that I purchased at the West Seattle Farmer's Market and a pinch of sea salt. The salad was fresh and absolutely delicious.
The general consensus is that the sandwiches were quite good. We did however, have a few ideas that might make the sandwiches even better. Dave recommended adding more pear and drizzling balsamic across the top of the bread. He also could do without the walnuts. Natalie thought that raw pears would add an interesting texture compared to sauteed pears. Brad was as happy as a clam with the way it was prepared. I really liked the sandwich, especially the walnuts, but I would probably choose a more dense white bread instead of sour dough. All in all, dinner was a success. You really can't go wrong with good bread, brie and pear. Sweet and savory is always a wonderful combination and this recipe definitely fit the bill.
Wednesday, April 13, 2011
Green Fruit Salad

Tonight I decided to prepare meat free bbq pulled pork sandwiches on fresh ciabatta rolls for the main course. I found a brand of tasty meat free products by a company called Gardein. My good friend Pamela will be happy to hear that this is a Canadian company. No, Pamela, regardless of how much I like this product, I am not going to sing "Oh Canada" any time soon. :) The back of the package reads "Really, protein from the garden? You bet! Gardein is a savory blend of nutritious vegetable and grain ingredients prepared and slow-cooked to have the authentic taste, texture and nutrition of premium lean meat." This is the second time I have prepared bbq "pork" sandwiches with these pulled shreds. Brad and I like the sandwiches a lot and the fact that there are only 170 calories per serving and a whopping 19 grams of protein only adds to the attraction.
The question today became what to serve with the sandwiches. I was feeling as though something light and fruity would cut the spiciness of the sandwiches and would lighten the meal. I found a lovely recipe for Green Fruit Salad in one of my salad cookbooks. This salad was the perfect partner to the main course. Of course, it didn't hurt that I ended up with the sweetest honeydew melon I have ever eaten. I forgot how good honeydew melon tastes when it is at peak ripeness. Preparation instructions are as follows:
Ingredients:
1 honeydew melon
2 green apples
2 kiwi fruit
4 ounces white seedless grapes
fresh mint sprigs to decorate
1 orange
2/3 cup white wine
2/3 cup water
4 Tbsp honey
mint sprigs
To make syrup, pare rind from the orange using a potato peeler. Put orange rind in pan with white wine, water and honey. Bring to boil, then simmer gently for 10 minutes. Remove syrup from heat. Add mint sprigs and set aside to cool.
To prepare fruit, first cut melon in half and scoop out seeds. Use a melon baller or a teaspoon to make melon balls (I love my melon baller. I just got it last summer and I sometimes buy melon just so I can use it :). Core and chop apples. Peel and slice kiwi fruit.
Strain cooled syrup into serving bowl, removing and reserving orange rind, and discarding mint sprigs. Add apple, grapes, kiwi and melon to serving bowl. Stir through gently to mix. Serve fruit salad decorated with sprigs of fresh mint and some of reserved orange rind. Serves 4.
We give this salad two enthusiastic thumbs up. Olivia ate the fruit sans syrup and she gave it a thumbs up as well.
Tuesday, April 12, 2011
Shrimp In Garlic Sauce; An Ode To Simplicity
I am going to come clean about this week's cooking plan. Last week was crazy for me. As mentioned in an earlier post, Olivia's birthday party was last Saturday and my family was here for three days. What I didn't mention is that Brad and I ran the Whidbey Island Half Marathon this past Sunday. Although it is my 23rd race, it was my first one in almost nine years. To say I was rusty is the understatement of the year; although the race did go much better than expected. As you may already know, a half marathon is 13.1 miles........ 13.1 long, painful miles. This particular race was a bit more challenging because there were strong headwinds and the second half was quite hilly. Despite these extra challenges, Brad ran the race in 2:05:49 and I ran it in 2:30:06. We both felt a strong sense of accomplishment and relief when the race was over. To make a short story long, I am feeling unmotivated (okay, lazy may be more appropriate) about most things this week; including my cooking project. I have decided to embrace my unmotivatedness so I will be choosing three recipes that are on the simple side this week. I promise they will be good recipes; they will just cater to my current disposition.

Here goes. My first recipe is Shrimp in Garlic Sauce. The preparation time would have been less than 10 minutes had I not decided to buy "easy peel" shrimp. The truth of the matter is that they were pretty easy to peel but I still had to devein them. The recipe specifically noted that deveining is strictly for aesthetic purposes and that it is not necessary to do so. This is not advice that I could heed because deveining is imperative for me. I have a serious aversion to all things veiny, so it absolutely had to be done. This process was not quick but once the shrimp were ready, the recipe was a piece of cake. The recipe is as follows:
Ingredients:
1/3 cup olive oil
4 cloves garlic, cut into thin slices
1 bay leaf
1/4 teaspoon dried red-pepper flakes
2 pounds large shrimp, shelled
1 1/4 tsp salt
1/4 tsp fresh-ground pepper
3 Tbsp dry sherry
2 Tbsp lemon juice
3 Tbsp chopped fresh parsley
In a large frying pan, heat the oil over moderate heat. Add garlic, bay leaf and red-pepper flakes and cook for 3 minutes, stirring occasionally. Add shrimp, salt and pepper to pan and stir to combine. Cook, stirring occasionally, until shrimp are just done, 4 to 5 minutes. Stir in sherry, lemon juice and parsley. (I halved the recipe because Brad and I could not and should not ever eat 2 pounds of shrimp by ourselves :).
Brad loved this dish. He actually said that if anyone thinks they don't like shrimp or prawns, they would change their mind after trying this recipe. He liked both the flavor and texture; which is a compliment from him because he is particular about shrimp texture. This recipe was simple but great. Just the way I like it this week.

Friday, April 8, 2011
Week Fourteen Recap
I am pleased with all three recipes I prepared this week. The first recipe with black beans and rice was simple but healthy and wholesome. The second recipe, pasta with prosciutto and zucchini, was excellent all the way around. The third recipe, Shallot Fig Spread, was delicious and quite unique. I love it when I am batting a thousand! Recap is as follows:
Baja Black Beans, Corn and Brown Rice
evitamins.com
Pasta Piccante Abruzzese con Prosciutto e Zucchine
"Pasta" by Marlena Spieler
Page 132
Shallot Fig Spread
"Clean Start" by Terry Walters
Page 129
Shallot Fig Spread


I decided it was time to make something completely different than the dishes I have made thus far. I was trying to come up with an original idea when I came across this recipe for Shallot Fig Spread. I am going to jump right into the recipe because the ingredients are so pleasing. As a side note, I used all organic products.
Ingredients:
1 cup dried Turkish figs (about 12)
2 cups water
7 shallots, peeled and thinly sliced
1 Tbsp extra virgin olive oil
1 Tbsp grated fresh ginger
zest of 1 large orange
juice of 2 oranges
2 Tbsp maple syrup
Have you ever eaten Turkish figs? I know I have never used them in a recipe prior to this and I don't think I have ever eaten them. First of all, they are a gorgeous product. I couldn't help but take a photo of the halved figs and sliced shallots. I used an organic, sulphite free Turkish fig by a company called Lerida out of Oakland, California and I couldn't wait to taste them. Okay, back to the recipe:
Prepare figs by discarding tough stem ends and cutting into halves. Place in small pot over medium-high heat with 2 cups water and bring to boil. Simmer until liquid is reduced to 1/2 cup (about 20 minutes). Remove from heat and set aside, keeping figs in liquid.
Over medium heat, saute shallots in olive oil until very soft (about 15 minutes). Add ginger, orange zest and juice. Stir continuously and saute 5 minutes longer. Add figs, reduced liquid and maple syrup. Stir to combine and remove from heat. When cool enough to touch, transfer mixture to mixing bowl and gently puree with handheld blender or food processor until spread is blended but some figs and onions are still visible. Cover and refrigerate at least 1 hour before serving. Makes 2 cups.
The recipe suggested using a rice cracker thin for serving or diluting the spread with orange juice or water to use as a savory marinade. I served the spread with Pecan Nut & Rice Crackers, which I thought worked quite well.
Tuesday, April 5, 2011
Pasta Piccante Abruzzese con Prosciutto e Zucchine

I officially have a favorite go-to cookbook. I just completed my third recipe from the Marlena Spieler cookbook, "Pasta" and it was fantastic! I have come to believe that recipes from this cookbook are just plain dependable. There is an authenticity to these dishes that makes them special but they are not too complicated for a novice cook like me. I love that I can choose a recipe from this book and create a gourmet dish that wows my family and anyone dining with us. Tonight I prepared Pasta Piccante Abruzzese con Prosciutto e Zucchine. I can't say enough about the flavors of this dish. As with the other dishes I have prepared from this book, there is a rustic flair that I have not been able to create with recipes from any other Italian cookbook. Kudos to Marlena Spieler for compiling a collection of recipes that never ceases to please.
Ingredients:
2 large red or yellow peppers (I chose yellow because the color is springy)
1 onion, finely chopped
1 small to medium courgette (zucchini) diced
4 Tbsp extra virgin olive oil
4 ounces prosciutto, cut into shreds
5-7 cloves garlic, chopped
15 ounce can chopped tomatoes or 1 lb, 5 ounces fresh tomatoes, with 2 Tbsp tomato puree
2 pinches crumbled dry chilli
5 ounces dry white wine or stock
pinch of mixed dried Italian herbs or oregano
pinch of sugar
salt and freshly ground black pepper
1 lb gigli pasta (lily shaped pasta) or any other pasta with ruffled edges, penne will work as well
5 Tbsp freshly grated Parmesan or Pecorino, plus extra for serving if desired
10-15 leaves or more fresh basil, shredded
4 large Tbsp ricotta cheese
Preheat grill or oven to high and grill peppers until charred and blackened all around; watch them carefully and keep turning them. Place in bowl, cover and leave for at least 15 minutes or until they are cool enough to handle. Meanwhile, lightly saute onion and courgette in olive oil in a large pan until softened, then stir in prosciutto and garlic. Keep stirring for a few moments and remove from heat.
Peel and coarsely chop peppers, discarding skin, stem and seeds and add them with their juices to the pan along with tomatoes, chilli, wine, dried herbs, and sugar. Season to taste. Return to heat and bring to boil, then reduce heat and simmer to thicken sauce while you cook pasta.
Bring large pan of salted water to boil and cook pasta until al dente, the length of time will depend on type of pasta. Drain and toss with sauce, Parmesan and basil, then serve in large bowls each topped with a dollop of ricotta and, if desired, a little extra basil and Parmesan. Serves 4.
A couple side notes. I used a pasta called campanelle which is lily shaped and I assume much like gigli. The point of using this type of pasta is to have nooks and crannies so the sauce has somewhere to sit. I also made a point to cook the pasta al dente. This recipe requires that the pasta is not overcooked. It seemed to me that it was better to undercook the pasta a bit because it continued cooking when it was stirred into the pan of sauce.
This is delicious! I highly encourage you to try a few of the dishes from this cookbook or to purchase the book. I actually found mine at my favorite local bookstore called Leisure Books for $10. This is one of the best $10 bills I have ever spent. Buon Appetito!
Monday, April 4, 2011
Baja Black Beans, Corn and Rice
What a fabulous weekend! Olivia's birthday was really special this year. All of our relatives including great grandparents were here to celebrate with us. My brother, Nick, flew in as a surprise on Saturday morning, which was the icing on the figurative cake. There was also great icing on the literal cake thanks to Metropolitan Market. We ended up not only celebrating Olivia, but our family in general. It was a much needed and long overdue time together. I am thankful for every minute we were able to spend with our most loved ones.
With this being said, we did not eat like we normally do this weekend. I told Brad this morning that I don't think I could even look at one more piece of pizza. You know you've had too much cake and pizza when you can no longer stand the thought of either one! Needless to say, when I woke up this morning, I knew I wanted to make brown rice, beans and vegetables for dinner. Nothing like a healthy, fiber filled meal to make you feel better after a weekend of eating junk. I ended up googling brown rice and black beans and found this simple and wholesome meal on evitamins.com. It was a winner all the way around. I highly recommend this dish when you need a quick, healthy dinner.
Ingredients:
6 cups brown rice
1/2 red onion, chopped
15 ounce can black beans
15 ounce can corn
4 tomatoes, chopped
2 Tbsp lime juice
1 Tbsp olive oil
1/2 cup cilantro
1/2 tsp salt
1/4 tsp black pepper
2 dashes hot sauce
1 jalapeno pepper seeded and diced
Cook brown rice. In medium bowl, combine black beans, corn, tomatoes, onion, cilantro, jalapeno (I left the jalapeno out because it would be too hot for Olivia), lime juice, oil, salt, pepper and hot sauce. To serve, place scoop of hot rice in bowl or on plate, top with generous scoop of black bean mixture and stir together. That's it! Couldn't be easier.
Friday, April 1, 2011
Week Thirteen Recap and A Birthday Girl!


What a fun week of cooking! I had one excellent dish, one great dish and one good dish. As long as there weren't any duds, I am a happy camper. Today is my sweet Olive's third birthday so my goal was to have all three recipes prepared by yesterday. Mission accomplished! Now we can celebrate with family and friends without any dangling obligations.
Today I get to celebrate my most precious gift. Olivia brings sunshine and pure joy to me and Brad every day. She is a source of inspiration and motivation to be present in each moment so we can enjoy the world around us. We couldn't ask for a more loving, bright, funny, curious, determined, sweet little girl. Happy Birthday to our dolly cakes!
Recap:
Sea Bass Chowder
"Fresh and Simple" by Better Homes and Gardens
Page69
Banana and Almond Cake
grouprecipes.com
Lemon-Scented Quinoa Salad
101cookbooks.com
Subscribe to:
Posts (Atom)